Archive for July, 2008

Comments and Contact

Thursday, July 31st, 2008

I’ve gotten some e-mails lately from people who have wanted to comment here on the blog. I was originally concerned that just anyone would be able to post here but now it seems no one will post because you have to register first.  I have changed this (like most blogs you will need to give a name and e-mail) so now I would love to have your comments posted here.

Thanks!

Heather

Let’s Try This Again

Thursday, July 31st, 2008

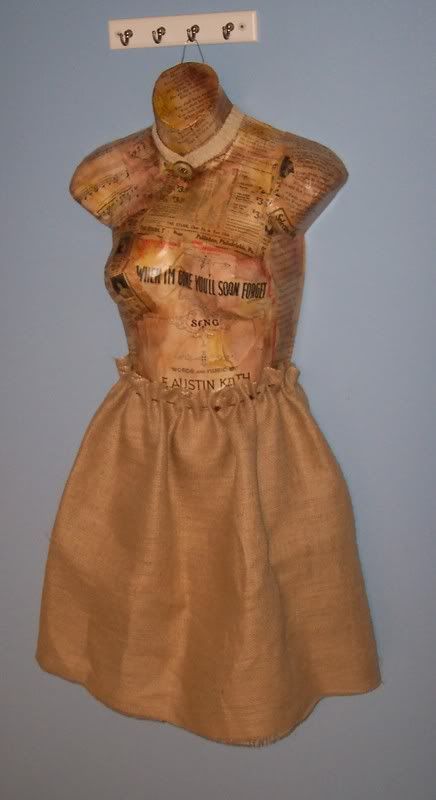
Ok, I got some burlap fabric and made another skirt for my “work in progress” mannequin. I think it works alot better than the other skirt, I hope my customer does too:)

Photobucket

A Work in Progress

Sunday, July 27th, 2008

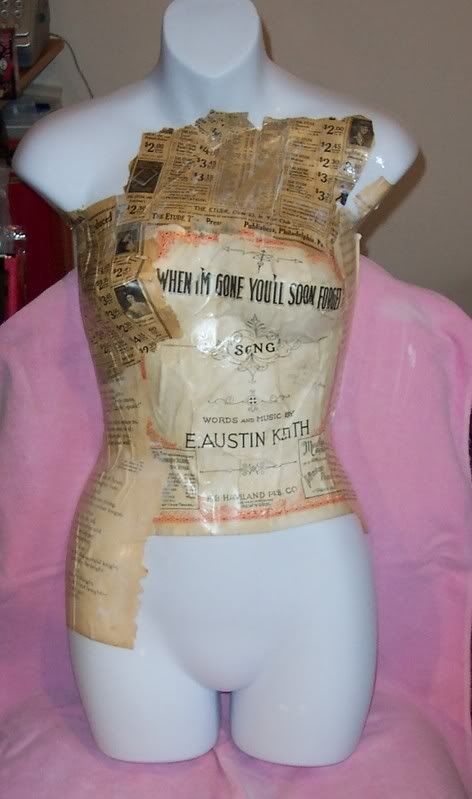
I sell some of my work at a wonderful shop in Mt. Sterling KY called “Finders Keepers”, tell James and Randy that Heather send you if you ever stop by:) And they have asked me to do a large commission piece for the shop and I thought I’d share some step by step of my process and when it’s complete I’ll post that here too.

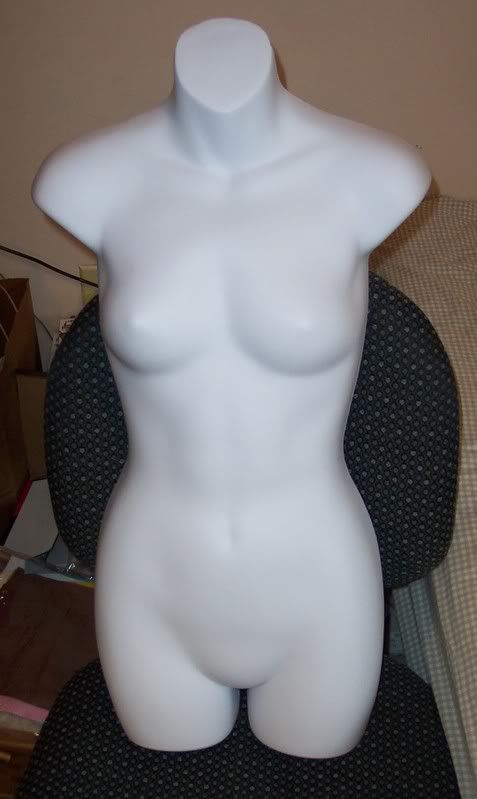
 The item is a life size white plastic mannequin, from the thighs up to the neck, it’s only the front half, no back. They wanted it collaged and then a skirt and some embellishment added.

Here’s the plain mannequin:
Photobucket

Because it was so large I worked on it in a chair covered with an old towel, to catch the drips. I wanted to use large pieces of paper to cover as much area as I could at a time. All the papers I used are very old vintage papers from books, musics sheets, the cover of a music sheet and an old magazine cover. I used a foam brush and Mod Podge to apply the papers, it took nearly an entire large jar of Mod Podge to cover the whole piece in the end! 🙂 I would first mold a piece of paper to see where it would fit and how it would look, creasing and folding if need, this helps the paper remember the shape when you actually apply it. Then I covered the back of the paper with the Mod Podge and then also applied some to the mannequin and then lay the wet paper on, smoothing out bubbles and making it flat with my fingers. Then I applied another coat of Mod Podge over the piece of paper.

Here’s the first piece I glued down:
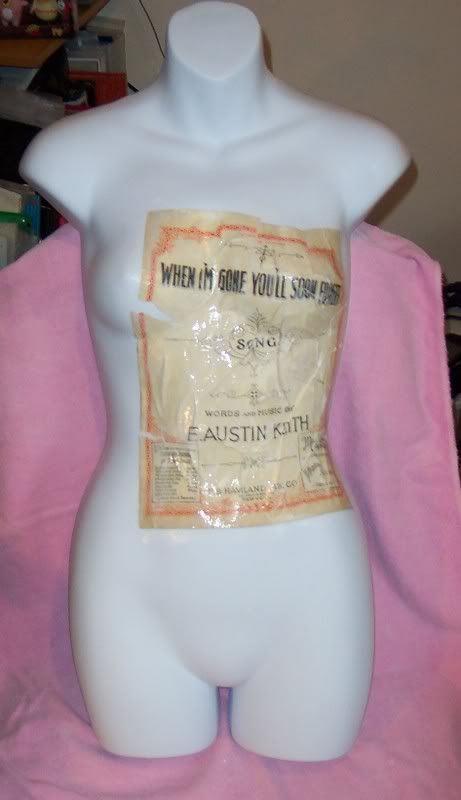
Photobucket

Then I just continued adding more:
Photobucket

Until the entire thing was covered, which took almost 4 hours:
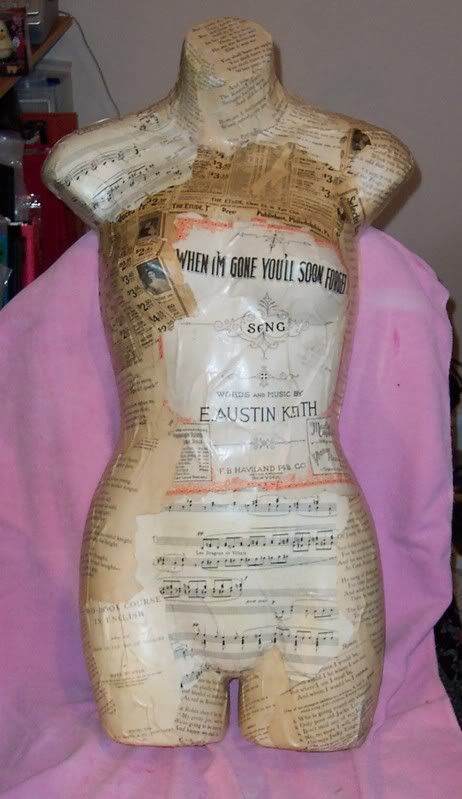
Photobucket

They wanted the piece to look old and dirty so after it dried I used a large round sponge and added many colors of brown and yellow inks to really age it up:
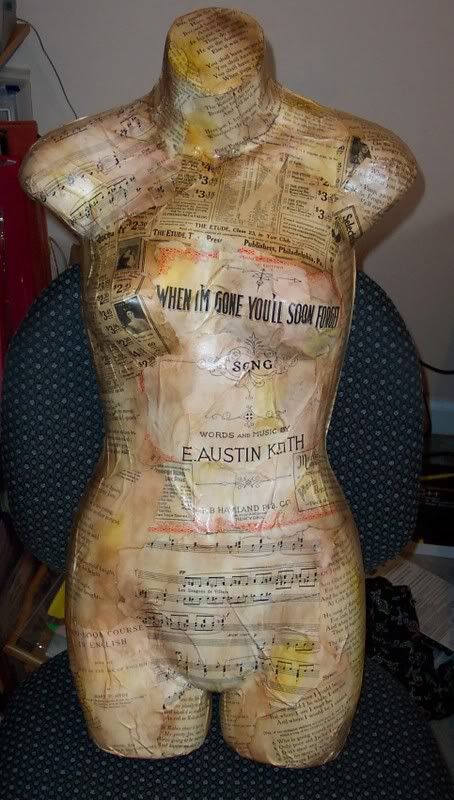
Photobucket

Then I added a choker made from vintage lace and an old button:
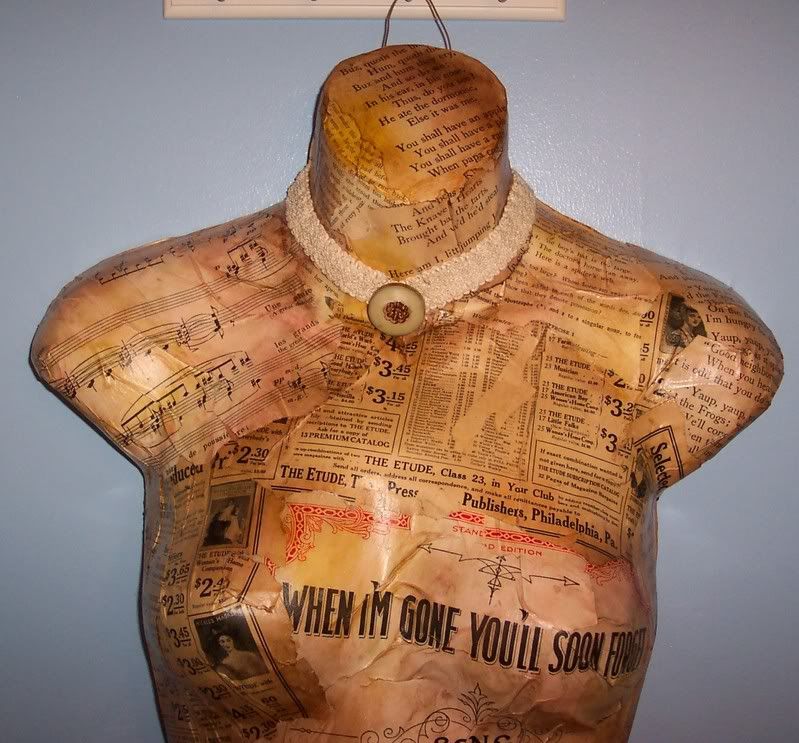
Photobucket

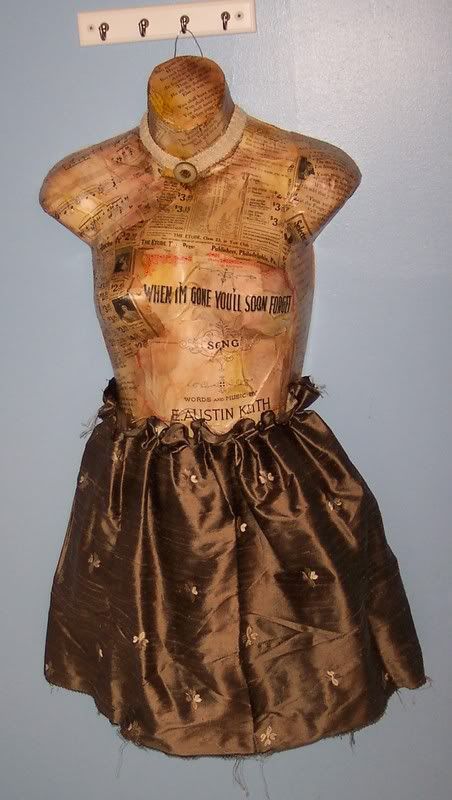
I then tried my hand at the skirt, the most challenging part for me. I used some pretty fabric I had and loosely stitched around cinching it at the top and attached it to the piece, I used pinking sheers on the edges and frayed them too:
Photobucket

The skirt just doesn’t work though, it too shinny and new for the piece so I’m going to change it. Burlap was suggested so I bought some yesterday and will give it a try. I’ll let you know how it goes 🙂

Hope you enjoyed a little peek into my working process. I really wish I had taken a picture of my hands while working on this, they were covered in Mod Podge, it looked like my skin was peeling off, eeewww 🙂

Wanna Play?

Wednesday, July 23rd, 2008

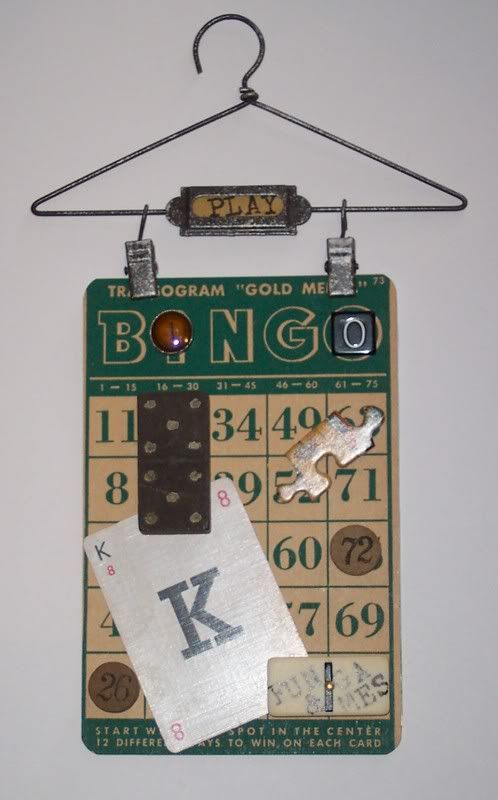
Here’s one of my collage that I did with all vintage game pieces, the background is an old BINGO card. This was a really fun and easy collage to do, I just made sure I used lots of strong adhesive to adhere everything since some of the pieces are heavy. Big glue dots, foam tape and E600 glue work really well to attach heavy items to paper.

This collage (and many others) is avialable to purchase on my new Etsy store. www.pisforpaper.etsy.com

Photobucket

I’m on Etsy!

Sunday, July 20th, 2008

I’m so excited to announce my brand new store on Esty.com ! You can now easily buy my art work directly from me. I have greeting cards, jewelry and collages there for sale. Please stop by my store and let me know what you think!

www.PisforPaper.etsy.com

Knock, Knock… Whooooo’s there?

Friday, July 18th, 2008

I’m loving the new trend with Owls! My grandmother, who passed away when I was 13, collected owls and so they always remind me of her:)

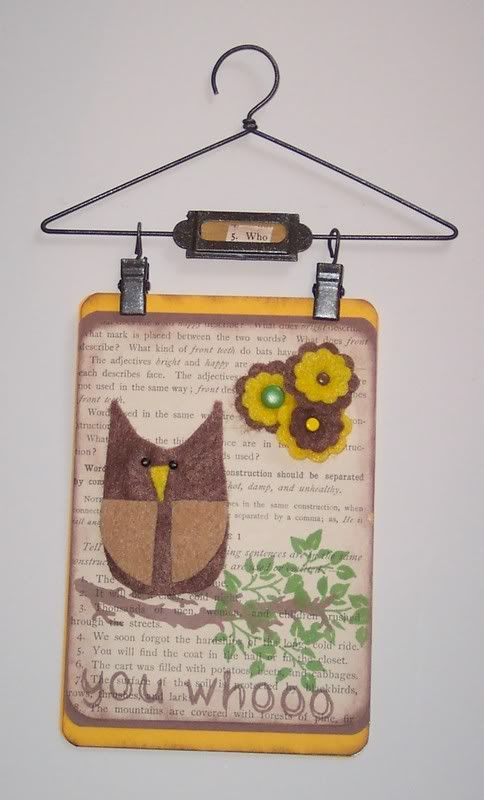
Here’s a postcard collage I did cutting the owl from felt (also a very hot trend right now). The background is cardstock and a page from an old text book, edges inked. The flowers are cut from felt using a Cuttlebug die cutting machine and attached with brads. The branch and leaves are rubber stamps.

Photobucket

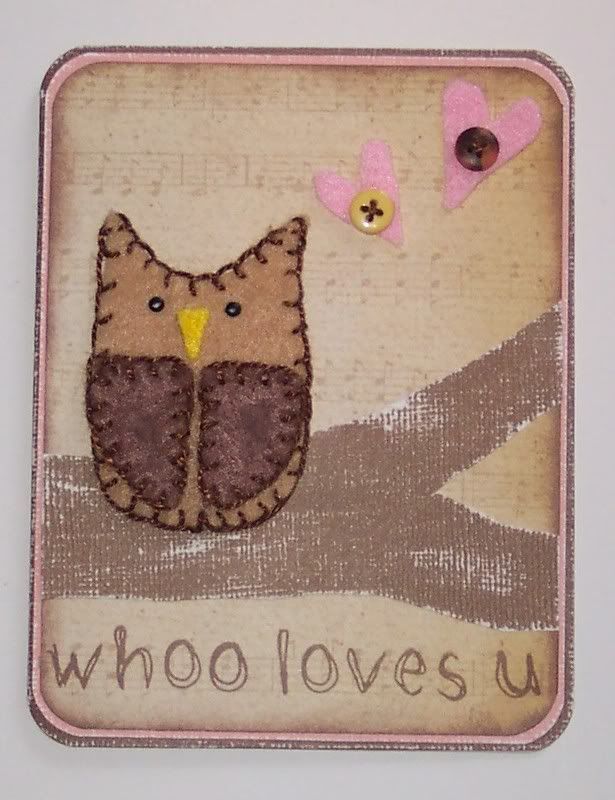
This one is a greeting card. I blanket stitched around the owl this time with pearl cotton, took awhile:) I cut free hand the limb from textured cardstock and sanded it for a more realistic look. The background is cardstock and scrapbook paper that looks like music sheets. The hearts are cut free hand from felt and sewn on through the buttons. The words are done stamps.

Photobucket

Both of these works are now available for sale on my Etsy store!

Christmas In July

Saturday, July 5th, 2008

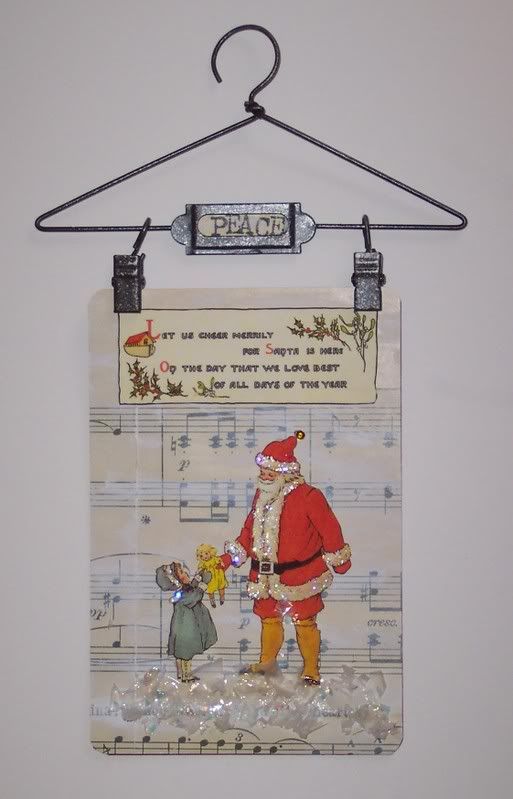
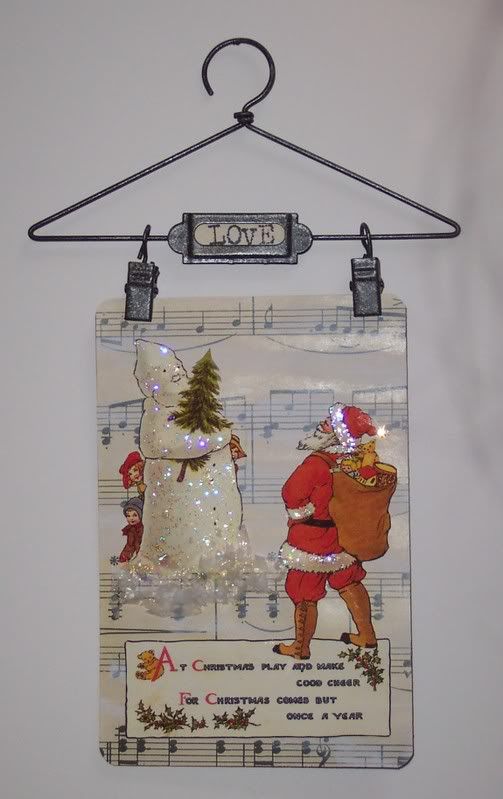
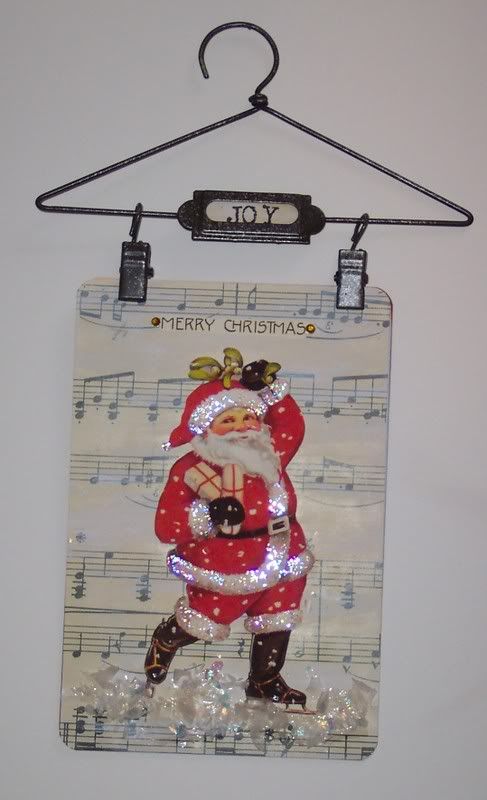
I thought I’d post a couple of holiday postcard collages since Christmas is only about 6 months away now!

I love the look of these vintage Santa Claus’ that I copied from old postcards. The background is old music sheets with gesso lightly brushed over. The Santa’s coats and hats are trimmed with glitter glue and I took some fake plastic snow (the kind that is glittery and chunky and comes in bags at the craft store) and glued it to the ground for the snow.

Photobucket

Photobucket

Photobucket