April 13th, 2015
Over on Craft Gossip I’ve shared a product review for some new items from Imagine Crafts and I wanted to share that project along with some instructions and step by step photos of how I made my project.

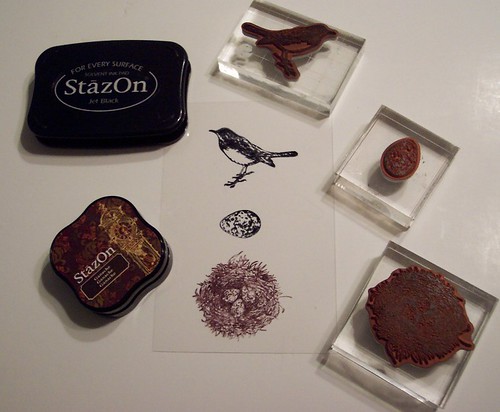
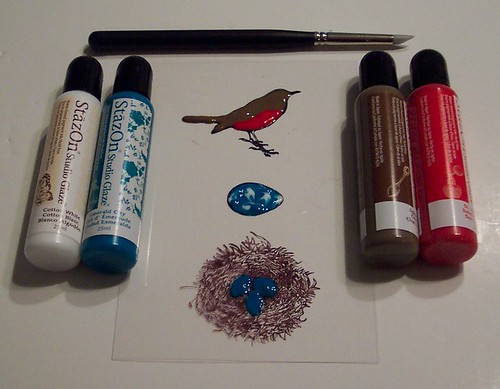
I started out using Black and Brown Staz On ink pads to stamp my bird, egg and nest onto clear acetate. I turned the acetate over and used the new Staz On Studio Glazes (in Emerald City, St. Valentine and Cotton White) to color my images. After letting the glaze dry it becomes shiny and a little transparent and on a clear service it gives an amazing stained glass effect! If you color outside of the edges you can push the glaze back using the sponge tip tools , these tools also work well for swirling colors, like I did with the blue and white on the egg. Next I attached my stamped acetate to a piece of sticky back canvas paper and cardstock using brads.


Next onto a canvas board I swiped streaks using the Blue Hawaii Staz On Midi ink pad and Broze Delicata Ink and then using one of the Palette knife tools I spread streaks of Bronze Metallic Creative Medium. After that dried I also sprayed some white Irresisitable ink spray.
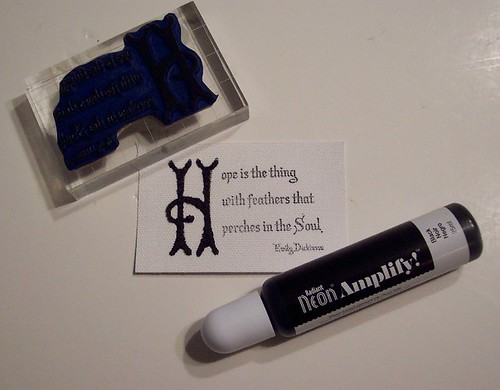
Lastly I used Black Staz On to stamp my quote for Emily Dickinson onto canvas paper and used the Black Radiant Neon Amplify to go over the large letter H. Amplify comes in bright neon colors as well as black and white and when heated with a heat tool it puffs up for texture and dimension. Then I adhered my words to my canvas and was done. I love how it turned out!
-Heather
Tags: , art, bird, canvas, collage, egg, emily dickinson, Imagine crafts, mixed media, nest, product review, project, tutorial
Posted in Collages on Canvas | No Comments »
April 7th, 2015
April showers bring out the flowers which also brings all the pretty insects too!
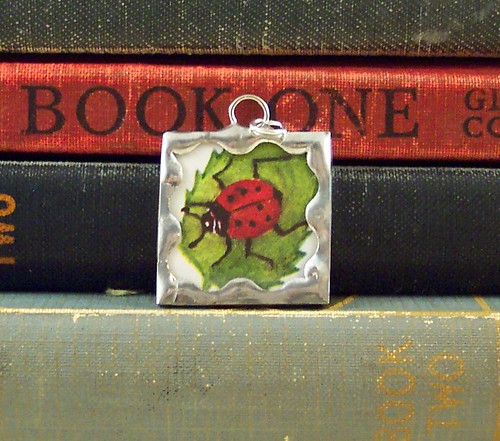
You can find these sweet Honey Bee and darling Lady Bug pendents in my Etsy shop. They are made using book illustrations from a vintage children’s dictionary.

-Heather
Tags: book, bugs, bumble bee, charm, dictionary, etsy, honey bee, illustration, insects, jewelry, lady bug, necklace, pendant, soldered, vintage
Posted in Collage Jewelry | No Comments »
November 5th, 2014
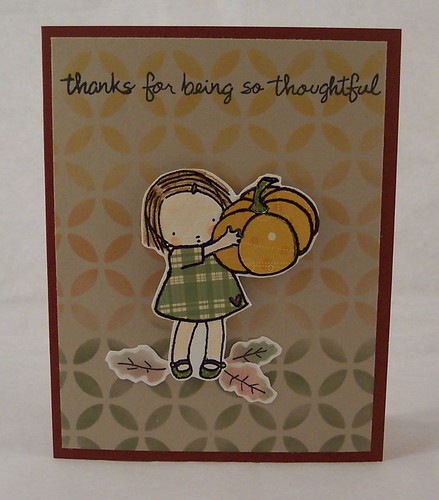
Stencils are super hot right now! Check out my review of the latest stencils from My Favorite Things over on Craft Gossip
Tags: card making, cards, fall, MFT, my favorite things, product review, pumpkin, review, stamping, stencils, thanksgiving
Posted in Announcements and Acknowledgments, Greeting Cards and Tags | No Comments »
October 27th, 2014
This custom collage was made for a friend to give as a gift to someone who loves Poe as much as I do.
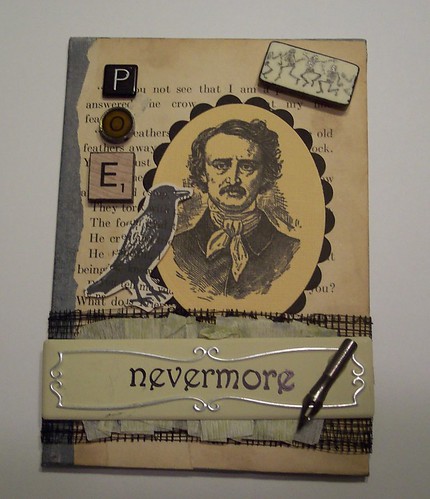
Here’s some details on how I made it:
-paint a 5″ x 7″ canvas board with gray paint,
-tear a page from a vintage book and adhere on canvas using gel medium
-print vintage clip art image of Poe on cardstock and die cut, layer scallop die cut behind and adhere to canvas
-stamp raven on book page scrap, cut out and adhere
-wrap bottom of canvas with black mesh ribbon and layer on crumped and inked crepe paper
-on a metal label embellishment stamp “nevermore” with Staz-On ink, adhere over ribbon and crepe paper
-glue pen nib to metal embellishment
-on back of large domino stamp skeletons with Staz-On ink, color sides of domino with black Sharpie marker, adhere to canvas
– adhere game tiles that spell “POE” to canvas
Thanks for stopping by and have a Happy Halloween!
Tags: , art, canvas, collage, edgar allan poe, halloween, mixed media, poe, raven, tutorial
Posted in Collages on Canvas | No Comments »
May 1st, 2014

I was really excited to be able to review the brand new line of alcohol based markers for Stampin’ Up called Blendabilities. Here’s my write up over on Craft Gossip:
http://stamping.craftgossip.com/product-review-stampin-up-blendabilities-markers-with-lots-of-samples/2014/05/01/
Tags: alcohol markers, blendabilities, card making, cards, dog, dog card, greeting card, markers, paper crafts, puppy, puppy card, puppy dog, rubber stamping, stamin up, stamped card, stampin' up
Posted in Greeting Cards and Tags | No Comments »
April 29th, 2014
Here are two new charm necklaces inspired by two of my favorite books and authors, Alice in Wonderland by Lewis Carroll and Pride and Prejudice by Jane Austen. Although these necklaces have sold necklaces like these can be purchased at my Etsy shop.
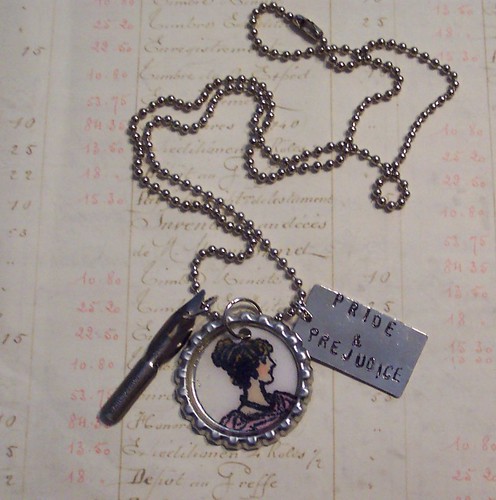
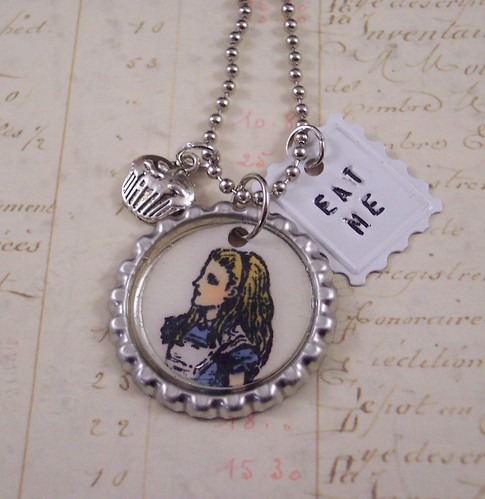
Both have hand stamped and colored images sealed with resin in scalloped metal bezels and hand stamped metal tags. Jane’s necklace has a ink pen nib charm and Alice has a cupcake charm. I’ve been teaching myself how to stamp on metal and it’s loads of fun, I love being able to add any words and text to charms.
Here’s how I made these.
For the main charms:
I first stamped the image I wanted onto white cardstock and colored them with alcohol markers and then use a round paper punch that was the same size as the inside of my jewelry bezel and punched out my colored images.
I used a little resin to place the circles inside the bezels (be sure to test your resin and make sure it won’t make your inks run) and then I used my Crop-o-dile punch to punch a small hole through the paper and the bezel.
I then filled the bezel with resin and let it dry make sure not to fill in the punched hole.
For the metal charms:
I placed the metal charm blanks onto a hammering block and using metal letter stamps and a small hammer to stamp out the words.
Next I used a permanent thin tipped black sharpie marker to add ink to the stamped letters.
I then added jump rings to all the charms and strung them on a ball chain.
Both of these charm necklaces are currently available in my Etsy shop.
-Heather
Tags: alice eat me, alice in wonderland, book charms, book necklace, cake necklace, charm necklace, charms, cupcake necklace, eat me, elizabeth bennet, jane austen, jewelry, lewis carroll, literary necklace, mixed media, pride and predjudice, wonderland
Posted in Collage Jewelry | No Comments »
March 30th, 2014
Here’s a cute Easter bunny card tutorial I made recently using stamps from Close to My Heart (large egg), Hero Arts (polka dot) and Some Odd Girl (all others).
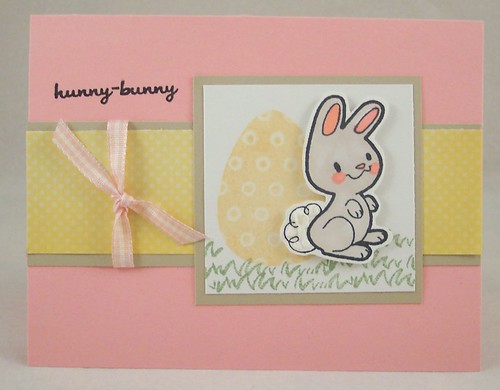
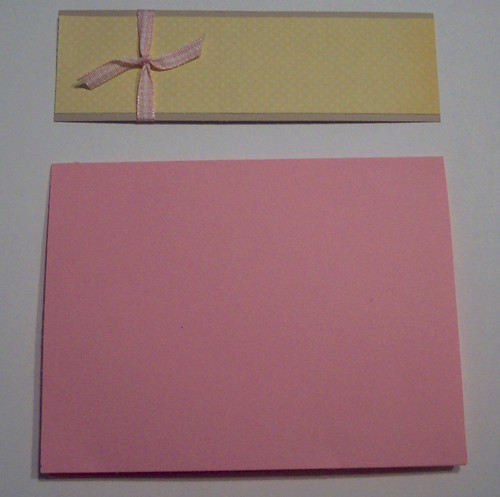
-Cut in half a pink piece of 8 1/2″x11″ cardstock and fold for card base
-Cut a yellow polka-dot pattern paper to 5 1/2″x 1 3/4″ and cut tan cardstock to 5 1/2″ x 1 1/2″, adhere together and tie around with pink plaid ribbon, then adhere to card front
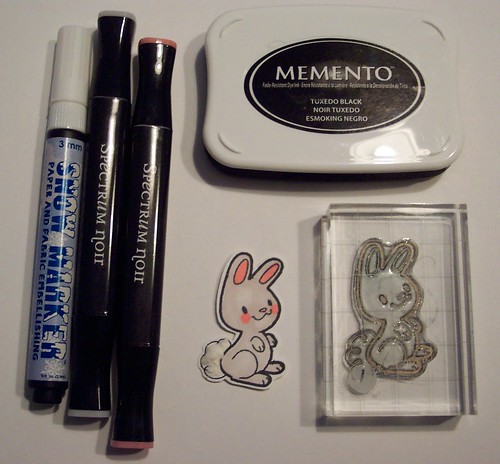
-On white cardstock stamp bunny, color with grey and pink markers (I used Spectrum Noir), apply snow pen or puffy white paint pen and heat with heat gun, cut out bunny
-Ink the large solid egg stamp with yellow ink and then press onto an un-inked large polka dot background stamp, this is called a kissing technique and it will transfer the background image onto the solid stamp.
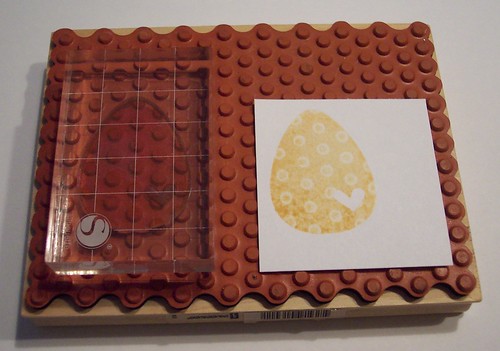
-Stamp egg onto 2 1/2″x 2 1/2″ white cardstock, stamp grass in green at the bottom, adhere to a 2 3/4″x 2 3/4″ piece of tan cardstock and adhere to card front
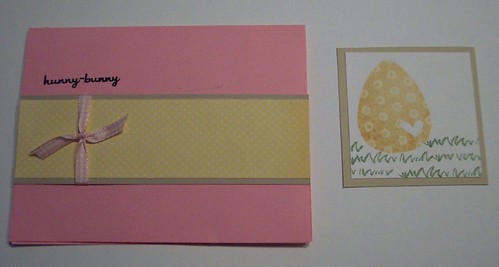
-Adhere bunny using foam tape next to egg
-Stamp words in black on card front
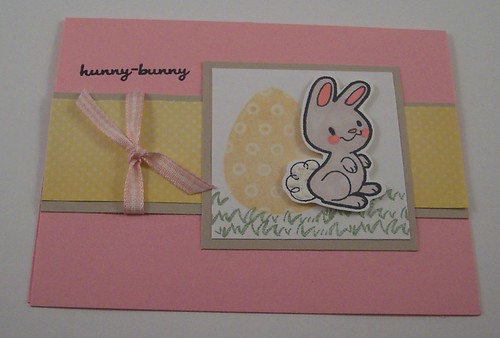
I hope you enjoyed this quick Easter card tutorial. You can find this card and others of mine for sale over here in my Etsy Shop.
Tags: bunny, bunny rabbit, card, ctmh stamps, easter, easter bunny card, easter card, greeting card, hand stamped card, note card, rabbit, rubber stamping, some odd girl stamps, spring, stamped, stamped card
Posted in Greeting Cards and Tags, Uncategorized | No Comments »
February 24th, 2014

The current challenge at the Lawnscaping Challenge blog is dusting off supplies you haven’t used in awhile. For my card I got out some yellow flocking powder which I haven’t used in ages and also some decorative edged scissors, which I also just don’t pick up as much any more, even though I probably have 8-10 pairs. I used stamps from the Lawn Fawn “Happy Easter” set, adding flocking to the little chicks, now they’re yellow and fuzzy! 🙂
To make this card:
cut a piece of green cardstock in half and fold for the card base
trim a floral pattern paper to 4″ x 5 1/4″ and adhere to card front
trim white cardstock to 5 1/2″ x 1″, line up flowers, eggs and chicks stamps on one long clear block and stamp twice with black ink
color all images exept chicks with markers
using a glue pen add glue to chicks and cover with yellow flocking powder, lightly press down and then tap off excess, let dry
cut blue cardstock to 5 1/2″ and cut one long edge with decorative scalloped scissors, punch small holes in each scallop
adhere stamped piece to blue piece and adhere to card front
stamp sentiment in black on card front
Tags: , chicks, directions, diy, easter, easter card, eggs, flocking, flowers, fun flock, greeting card, how to, lawn fawn, lawnscaping challenge, project, spring, stamping, tutorial
Posted in Greeting Cards and Tags, Uncategorized | No Comments »
February 20th, 2014
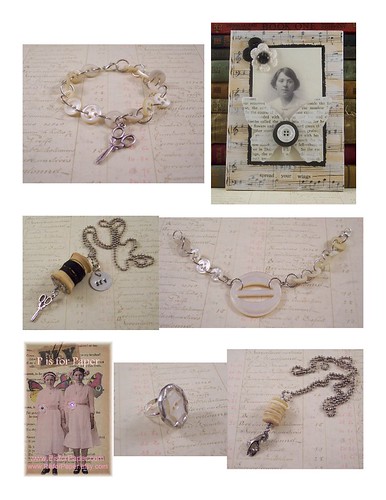
I love using vintage buttons in my jewelry and collage, especially white mother of pearl, so pretty! Here’s a grouping of jewelry and a collage I’ve made using buttons. Everything shown is currently in my Etsy shop.
Tags: art button collage, buckle bracelet, button bracelet, button necklace, buttons, charm necklace, collage, etsy, for sale, jewelry, mixed media, MOP buttons, mother of pearl buttons, necklace, sewing seamtress, sweing notions, vintage, vintage buttons, white buttons
Posted in 3D and Assemblage, Collage Jewelry, Collages on Canvas | No Comments »
February 10th, 2014
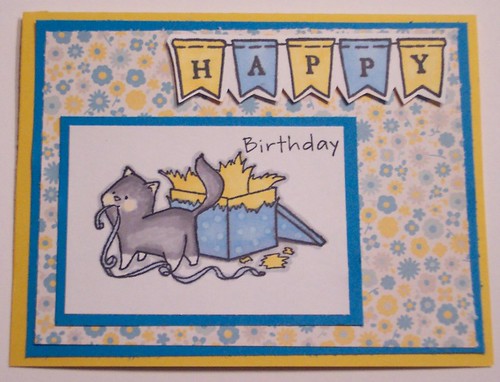
Just wanted to share the birthday card I made for my Mom this year. She has an adorable grey kitty with white “socks” on her legs so they named her Boots, so I used a kitty with a gift stamp from C C Designs and colored it with Spectrum Noir markers to look like Boots. The stamp is actually in a Christmas set but using bright yellow and blue colors instead of red and green it’s a perfect birthday stamp too. I also added the banner stamp from Lawn Fawn.
Tags: birthday, birthday card, c c designs, card making, cat, cat card, greeting card, kitty, kitty card, lawn fawn, rubber stamping, spectrum noir markers, stamped, stamped card
Posted in Greeting Cards and Tags | No Comments »


